
It only takes a couple of minutes.
Before we jump into the Scratch-it platform you will need four things:
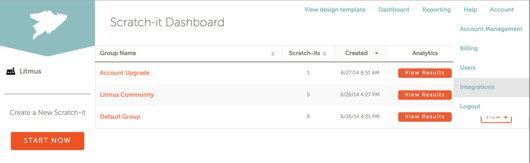
1. Open the account manager in your Scratch-it account and scroll to “integrations”.
2. Next, select Marketo from the ESP dropdown.
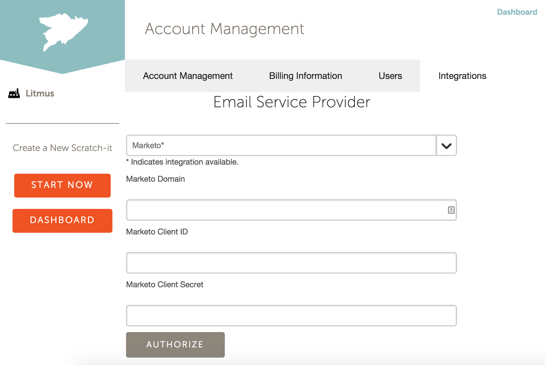
3. Fill in your Marketo Domain, Client ID, and Client Secret. Then press authorize.

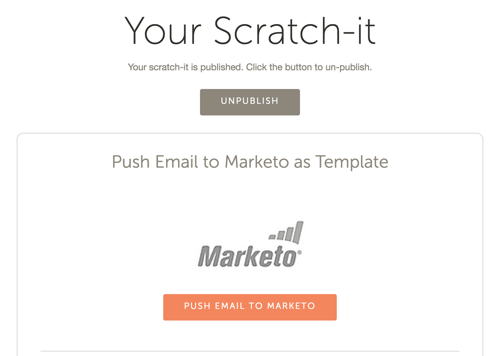
4. Proceed to the Scratch-it email editor and the Marketo logo will appear indicating the integration was a success. Here you can send a test of your email and push the html to Marketo.

5. Alternatively you can proceed to the Review & Publish page and push your Scratch-it email to Marketo.
List of Integration Features:
- Create Marketo email from Scratch-it account.
- Send a test email to your own address.
- Unique Scratch-it redeem codes.
- Edit and create custom templates.
- Build an unlimited number of Scratch-its.
CREATING AN API-ONLY USER
1. Select Admin tab at the top of the page.
2. Select Users & Roles from the left menu.
3. Select Invite New User at the top of the Users & Roles section.
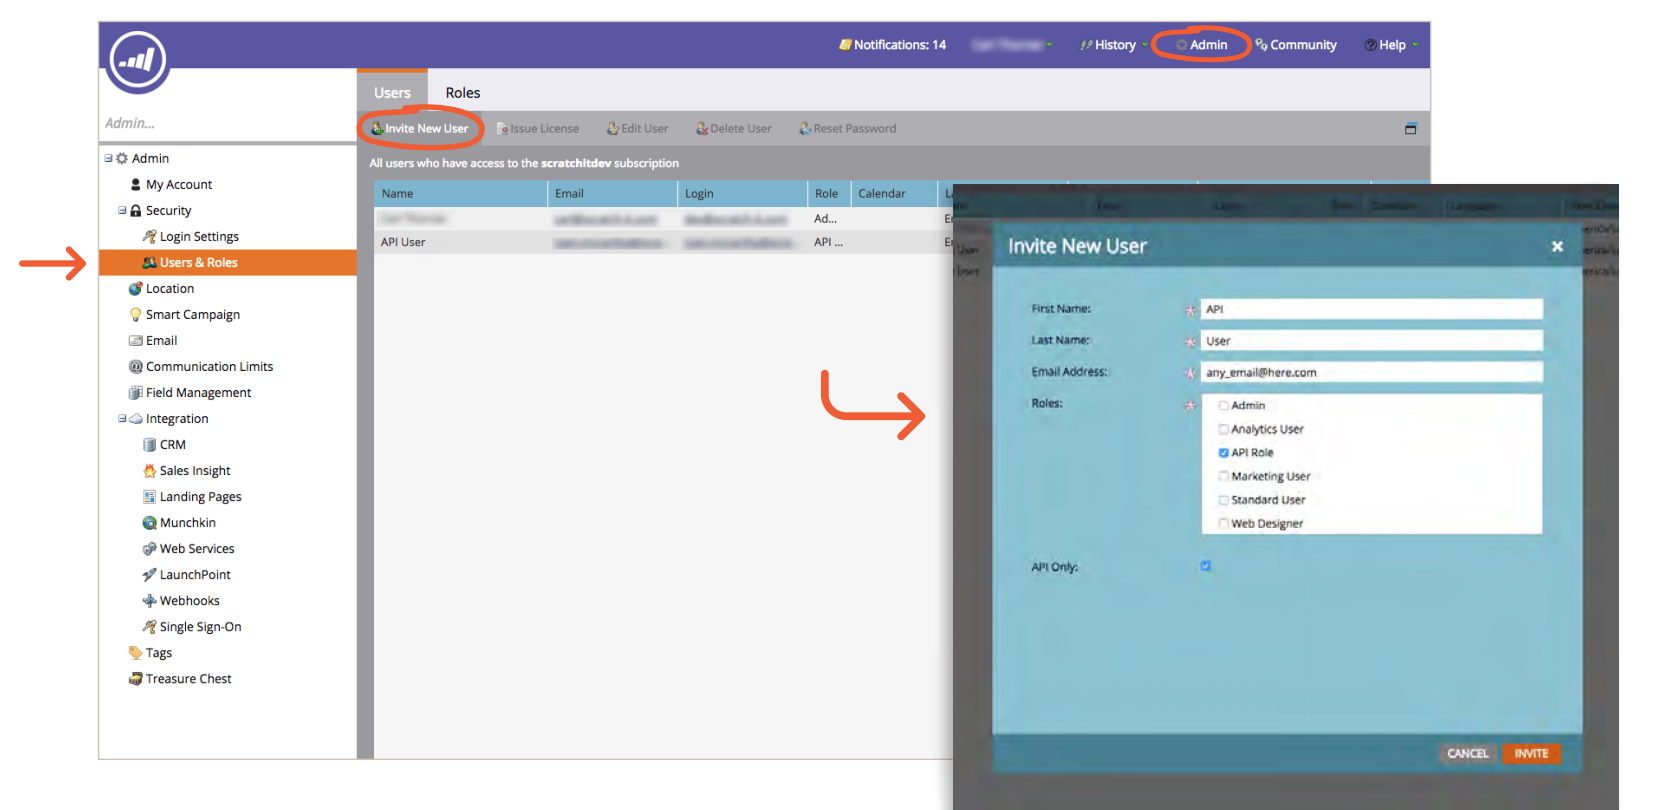
4. Fill out Invite New User form
The name/email information you put in here is not important (it will only be seen when sending test emails), just make sure that check boxes next to “API Role” and “API Only” are checked.
5. Click Invite
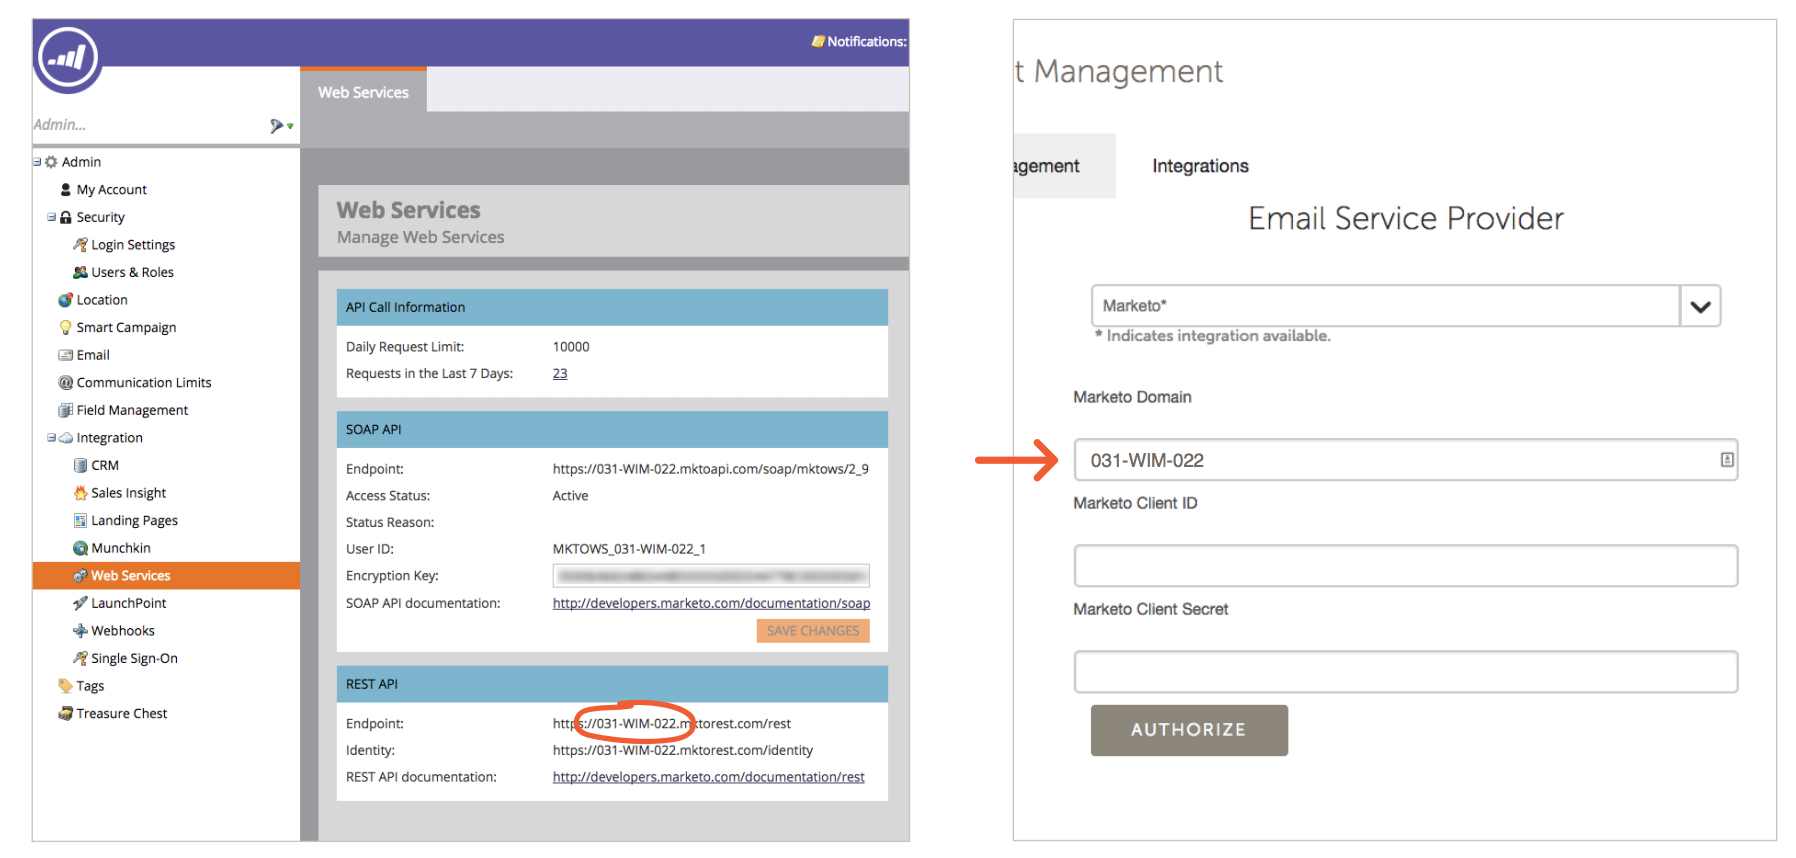
FINDING YOUR MARKETO DOMAIN
1. Select Web Services from the left menu.
2. At the bottom of the page, your Marketo domain is the 9-digit code separated by hyphens between “https://” and “mktorest.com.”
3. Enter this code (including hyphens) in the box labeled Marketo Domain (the top box) in the Scratch-it dashboard.
PREPARING MARKETO FOR INTEGRATION
1. Select Launchpoint from the left menu
2. Select New > New Service from the top of the Installed Services section.
3. For Display Name fill in Scratch-it
4. For Service select Custom
5. For Description fill in Scratch-it, or really, anything you want.
6. For API-Only User, select the API User you created earlier, then click Create.
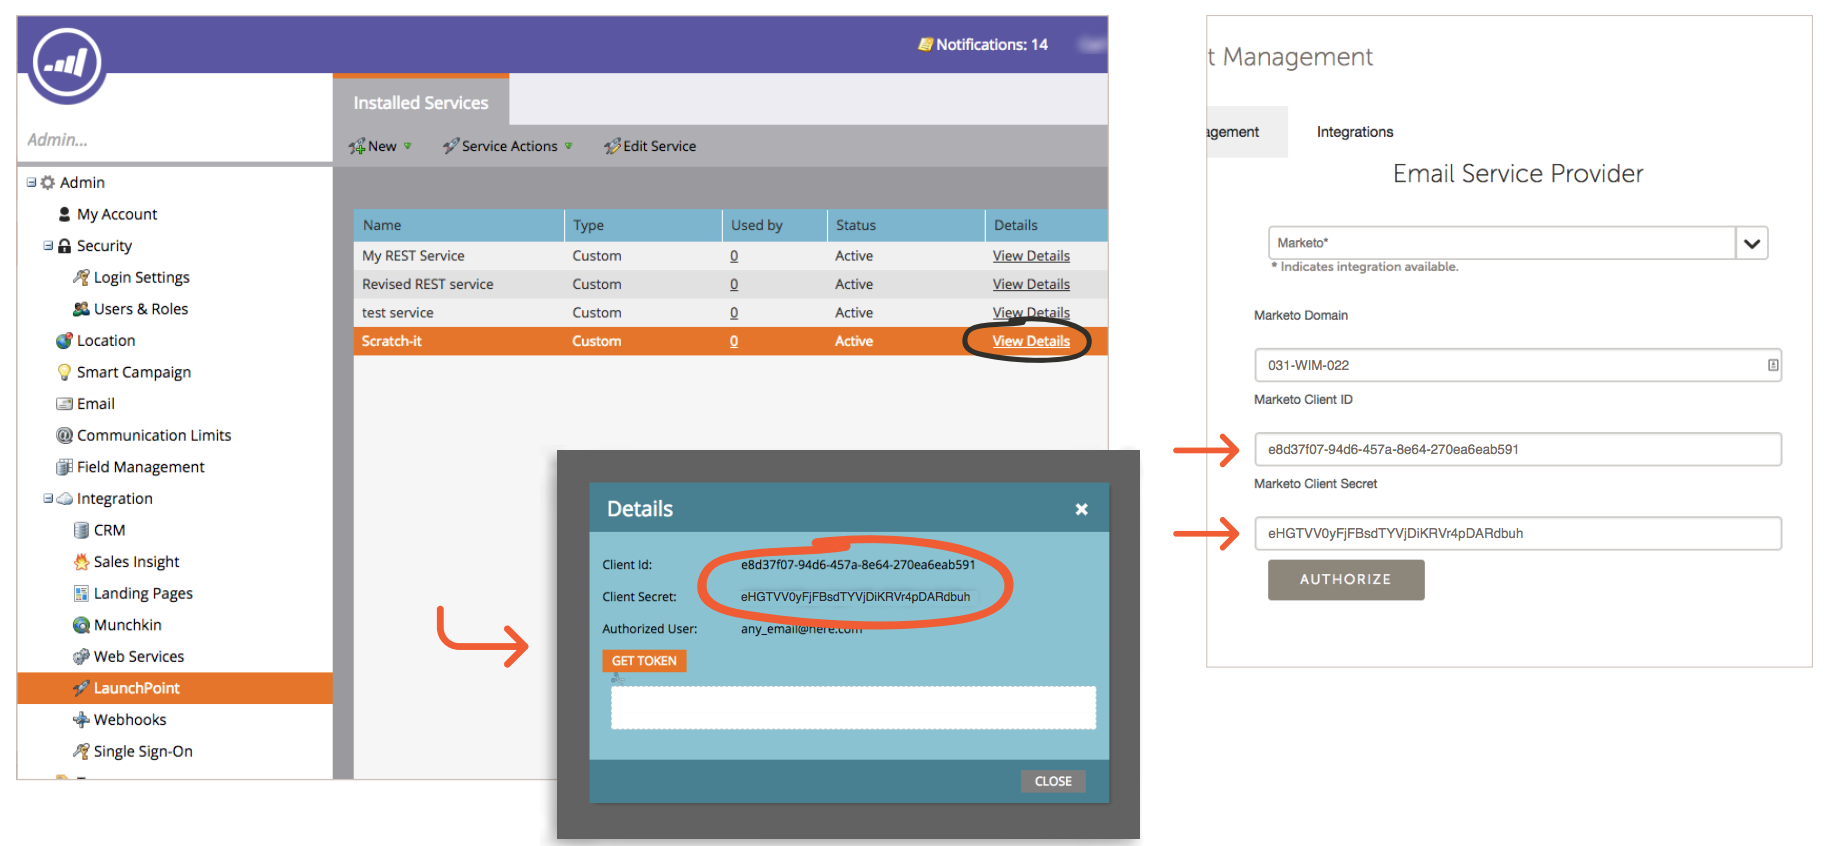
AUTHORIZING YOUR CLIENT ID
1. Find the newly created Scratch-it service and select View Details to the right.
2. Your Client ID and Client Secret appear in the popup. Copy-and-paste these two into the appropriate fields in the Scratch-it Dashboard.
3. Click Authorize and chant “No whammies, No whammies, No whammies”
USING THE SERVICE
You will now be able to send test Scratch-it emails and export emails to Marketo as templates directly from the Scratch-it wizard. These templates will be located in your Marketo account in Design Studio > Emails > Templates > Scratch-it. By default, these email templates will automatically be status “Approved.”
Still a bit confused?
If you have other products you would like to see integrated, or have any questions that were not answered here please drop us a line at info@Scratch-it.com